by Incrust Software
Share
What is JMeter?
JMeter is an open-source testing tool that analyzes and measures the performance of software and products. The tool is entirely Java-based and ensures performance testing, load testing, and functional testing.
How to Download and Install JMeter?
There is just one prerequisite for downloading and installing JMeter: to have Java installed in your system.
1. Check if Java Is Installed
- Open the command prompt
- Put the command java –version
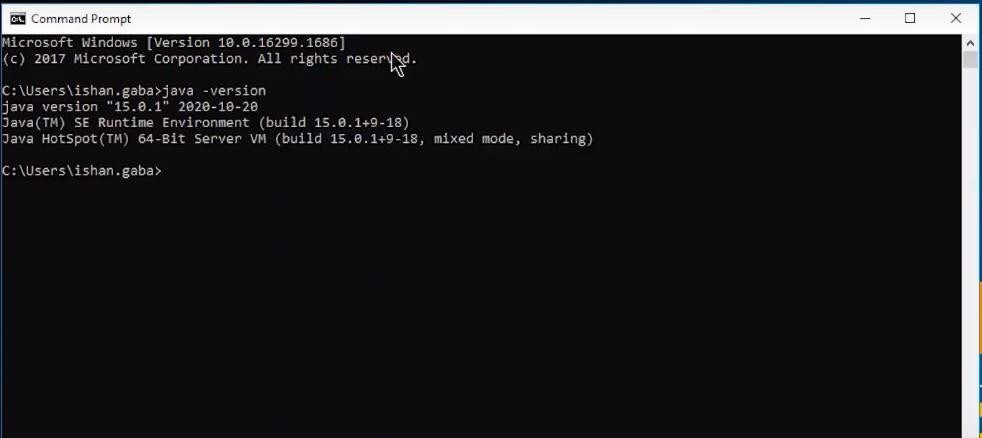
If you have Java installed in your system, the command will show the version of Java installed, else, before going forward with the installation of JMeter, you must install Java.
To know how to download and install Java, you can check this video.
2. Download JMeter
- To download JMeter go to the Apache JMeter website https://jmeter.apache.org/download_jmeter.cgi
- On the website go to the binaries section and download the zip file
- Wait for the zip folder to be downloaded
3. Install JMeter
- Once the zip folder is downloaded, go to the folder location, and then extract the zip folder
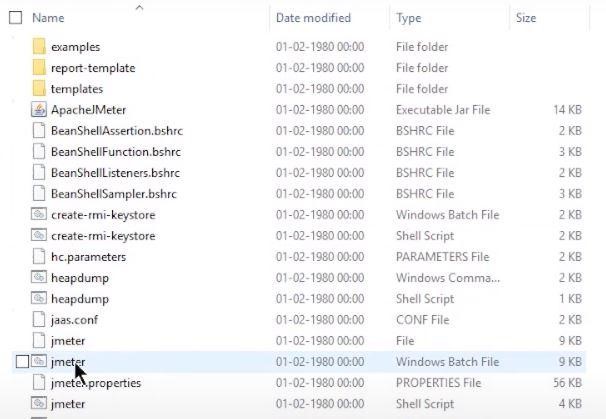
- Once the folder is extracted go inside that folder and then go inside the bin folder here
- In the bin folder open the jmeter.bat file
4. Create the First Test Plan
The first step in creating the test plan is
- Adding a Thread Group
- Open the JMeter window
- The window is divided into two parts.
- The left side has all the added elements, while the right side has all the elements’ configurations.
- Rename the test plan and save it
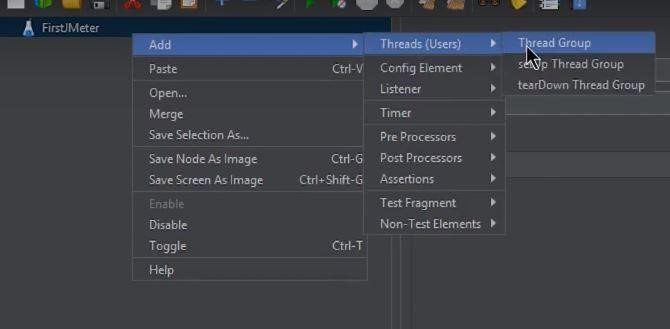
- Now, rename it as the FirstJMeter.Right-click on the test plan.
- Go to add -> Threads (Users) -> Thread Group
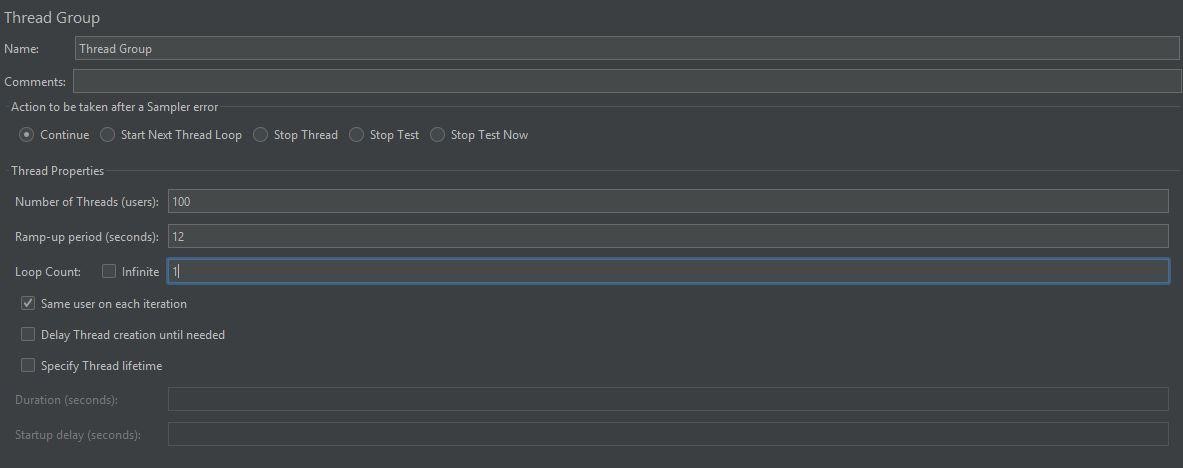
Now, once you click on the Thread Group, there are three things on the screen that are important concerning the load test:
● The number of threads (users):
This is the number of threads or users JMeter will simulate.
Let’s make it 100.
● Ramp-Up Period (in seconds):
This is the time that JMeter takes before starting the thread over.
Let’s keep this as 12.
- Loop Count:
This is the number of times the test will be executed.
And this one, let’s leave it to be 1.
The next step is to
Add an HTTP Request
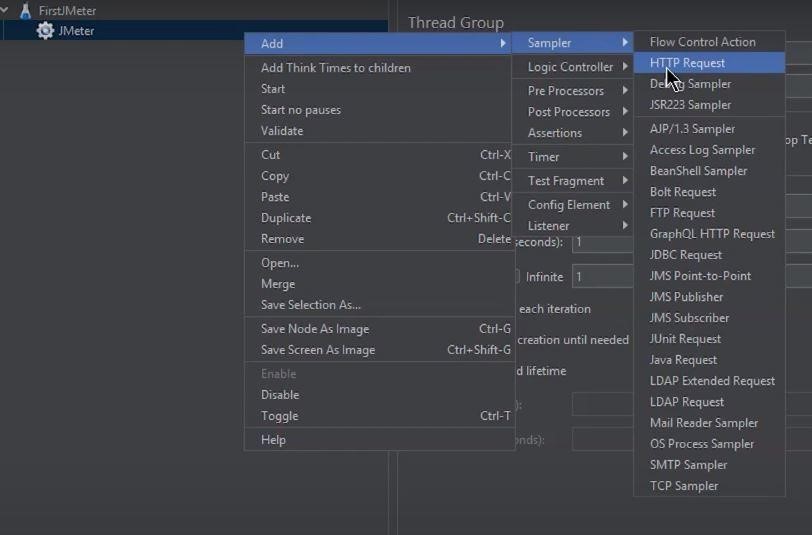
- Right-click on FirstJMeter and again go to add
- In the drop-down select samplers
These are all the types of requests that JMeter can work on.
- For now, choose the simplest of them all, the HTTP request.
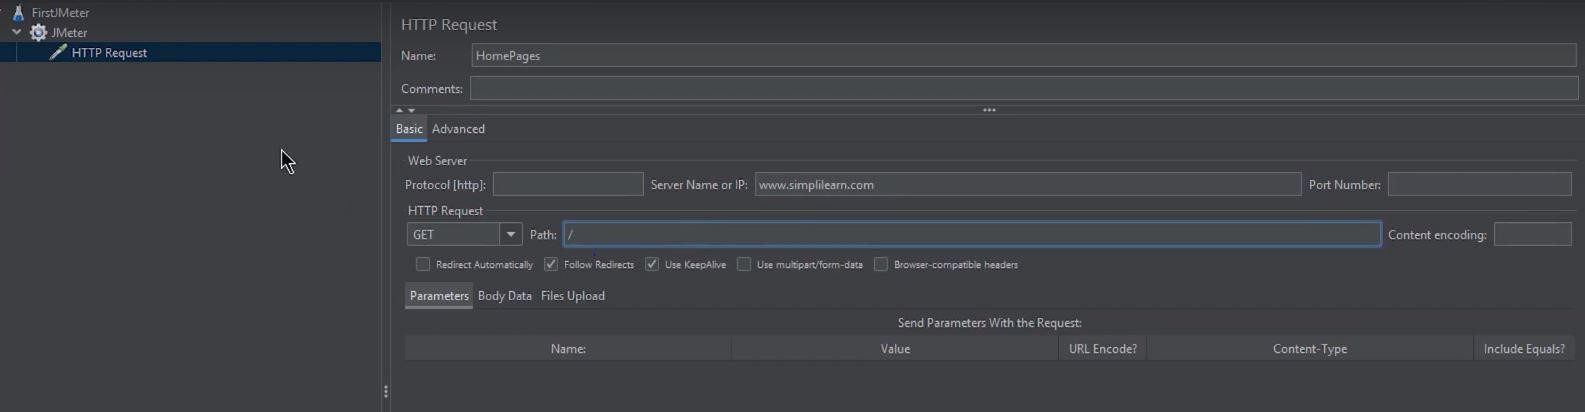
Here you will have to give the address to some home pages or websites.
Now, rename it to HomePages.
Here, in the Server Name or IP box, you have to give the server name or the IP.
Let’s pick up a website; for now, take Simplilearn’s website.
- Copy the URL
- Come back to the JMeter window and paste it into the Server Name box.
Don’t give HTTP or HTTPS since these are protocols that will come in the other box. They will be automatically taken in the HTTP request case.
- Then in the path dialog box, leave a forward slash there.
Now, when the HTTP test is ready, the next step is to perform the test on it. To perform the test:
Add Listeners
To determine what the results of the test will be, you need to add some more test elements.
- Right-click on FirstJMeter
- Go to listener options
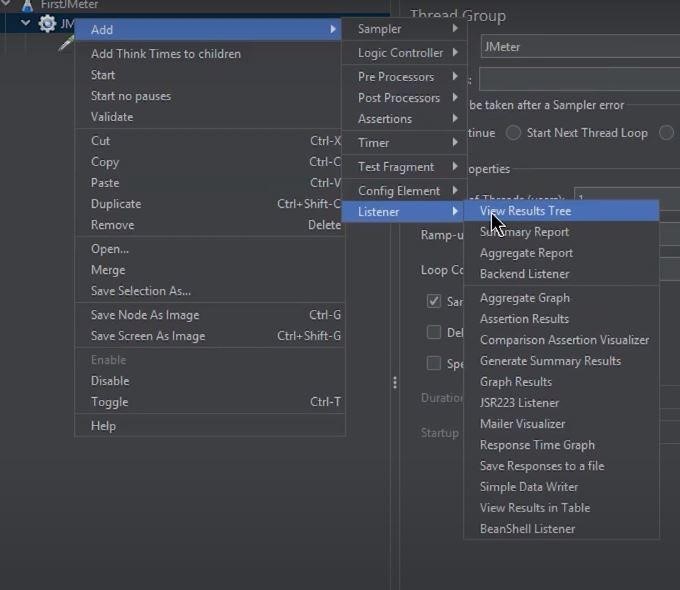
In the box that appears, there are different types of reports that JMeter provides.
For now, select two of these:
- View results in the table
- View results tree
Run the test
- Now, save the test and run it
- For running the test, click the green button
- Now, check the results of the test
- Go to view results in the table
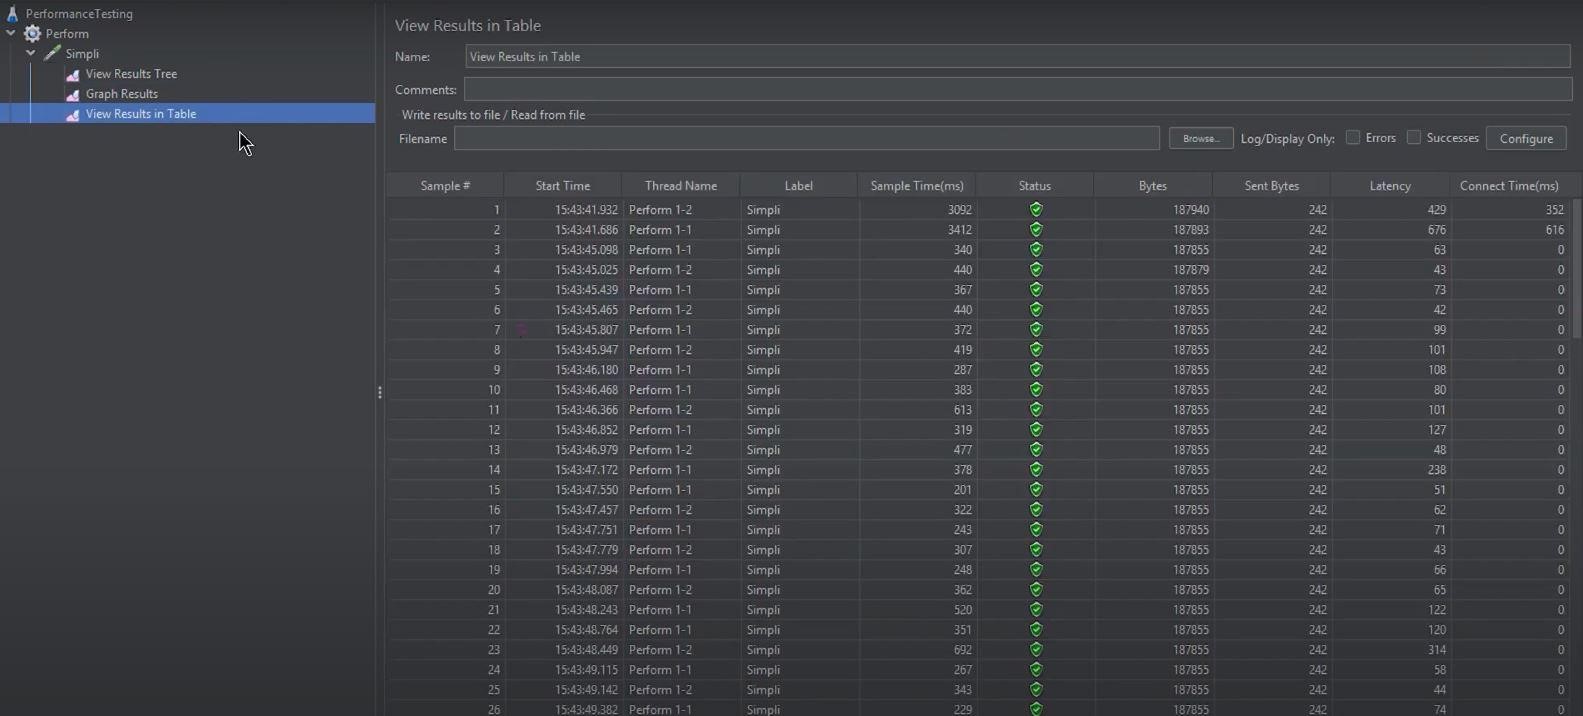
You can see the green status that shows that the test was successful. The label name: FirstJMeter and the sample time can be seen.
- Then check “view results in a tree”
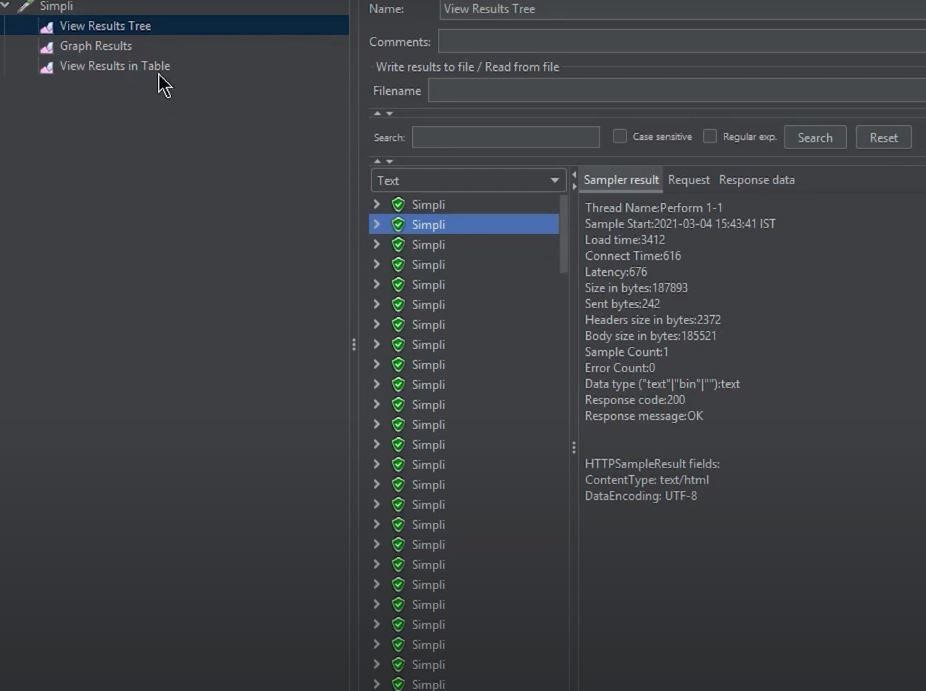
The green status or the success status can be seen here as well.
The test will be performed concerning the number of users, the ramp-up period, and the loop count set up in the first step.
Hence, here on the screen, it is evident that the test is still running. The time is taken, the number of tests being performed, and the status of each hit on the Simplilearn website can be seen.
And this is how performance testing is performed with the help of JMeter.
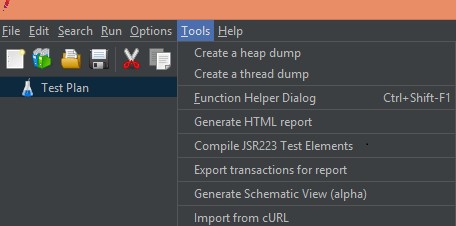
How to use the JMeter report?
- First, we need to go into the Tool menu; inside the tool menu, we have generated an HTML Report option, as shown in the following screenshot.
- Next, we need to provide the resulting and output paths and click the generate report button.
- Now successful creation of an HTML report dashboard will be appearing.
Let’s take an example of login functionality.
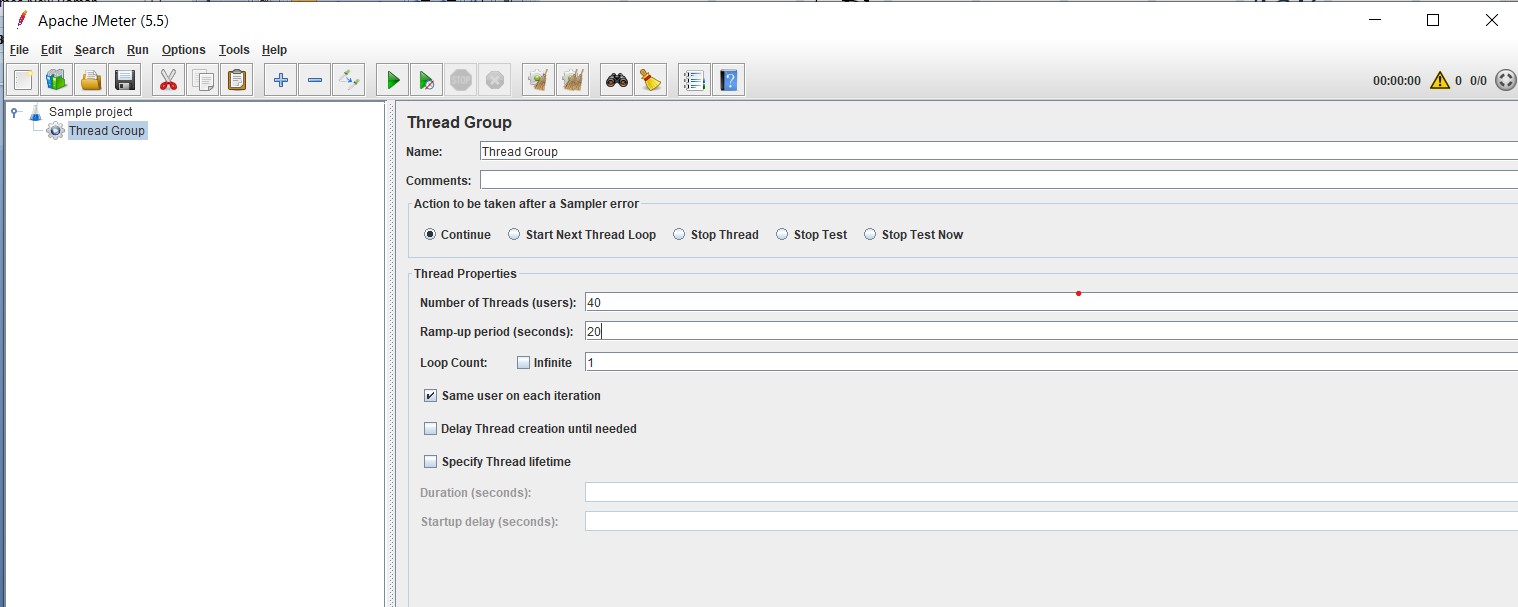
- Let’s make a one test plan whose name is “Sample project”
- Adding one thread group.
- Number of thread 40 & Ramp up period =20 which mean every second two users gets logged in with username and password.
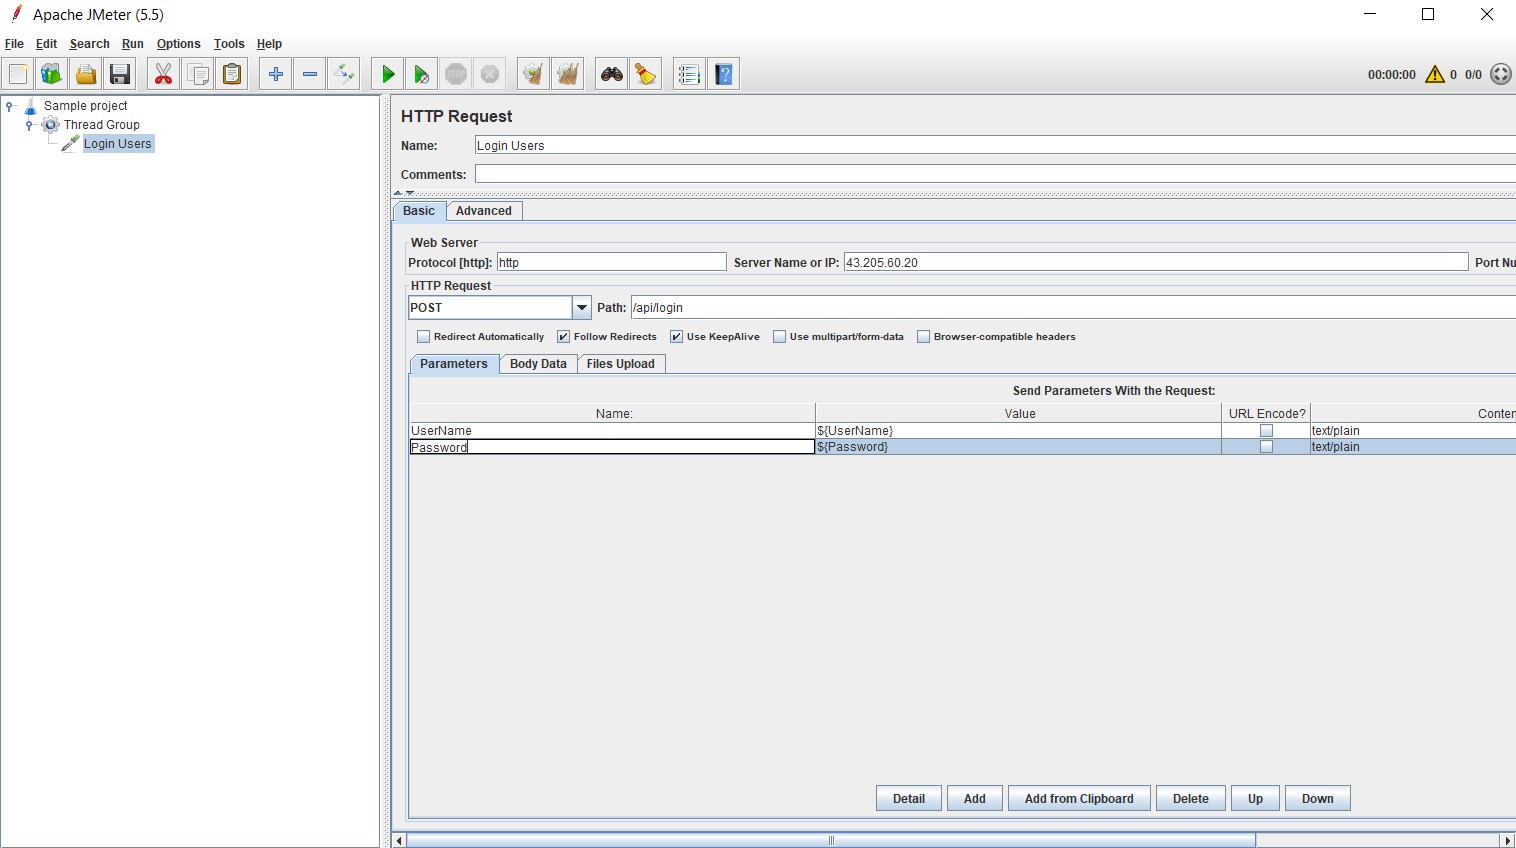
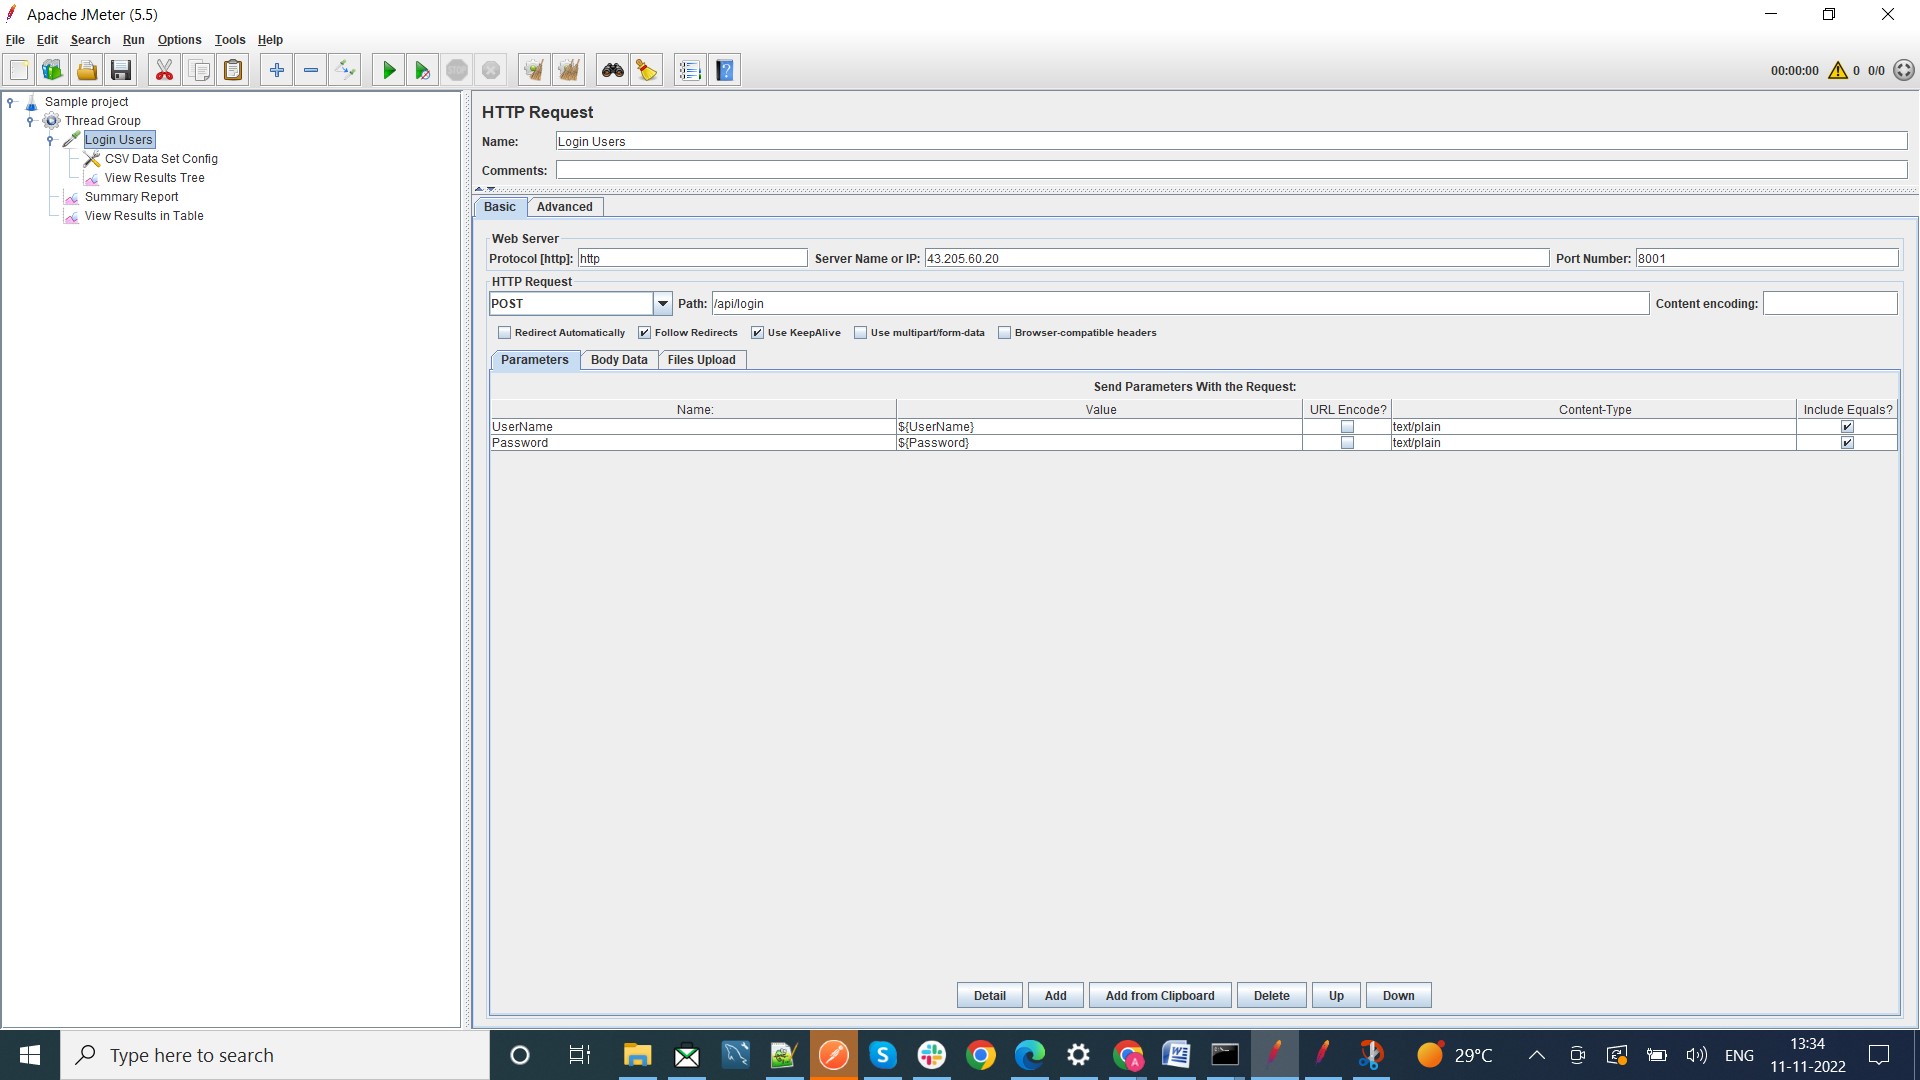
- Create one sampler whose name is “Login Users” and fill in the required data.
- We added some basic information Protocol HTTP, Server name, Port number, parameters, and HTTP request(Method).
- First of all, we have to import one excel sheet ( CSV) which contains two columns first Username, and another Password.
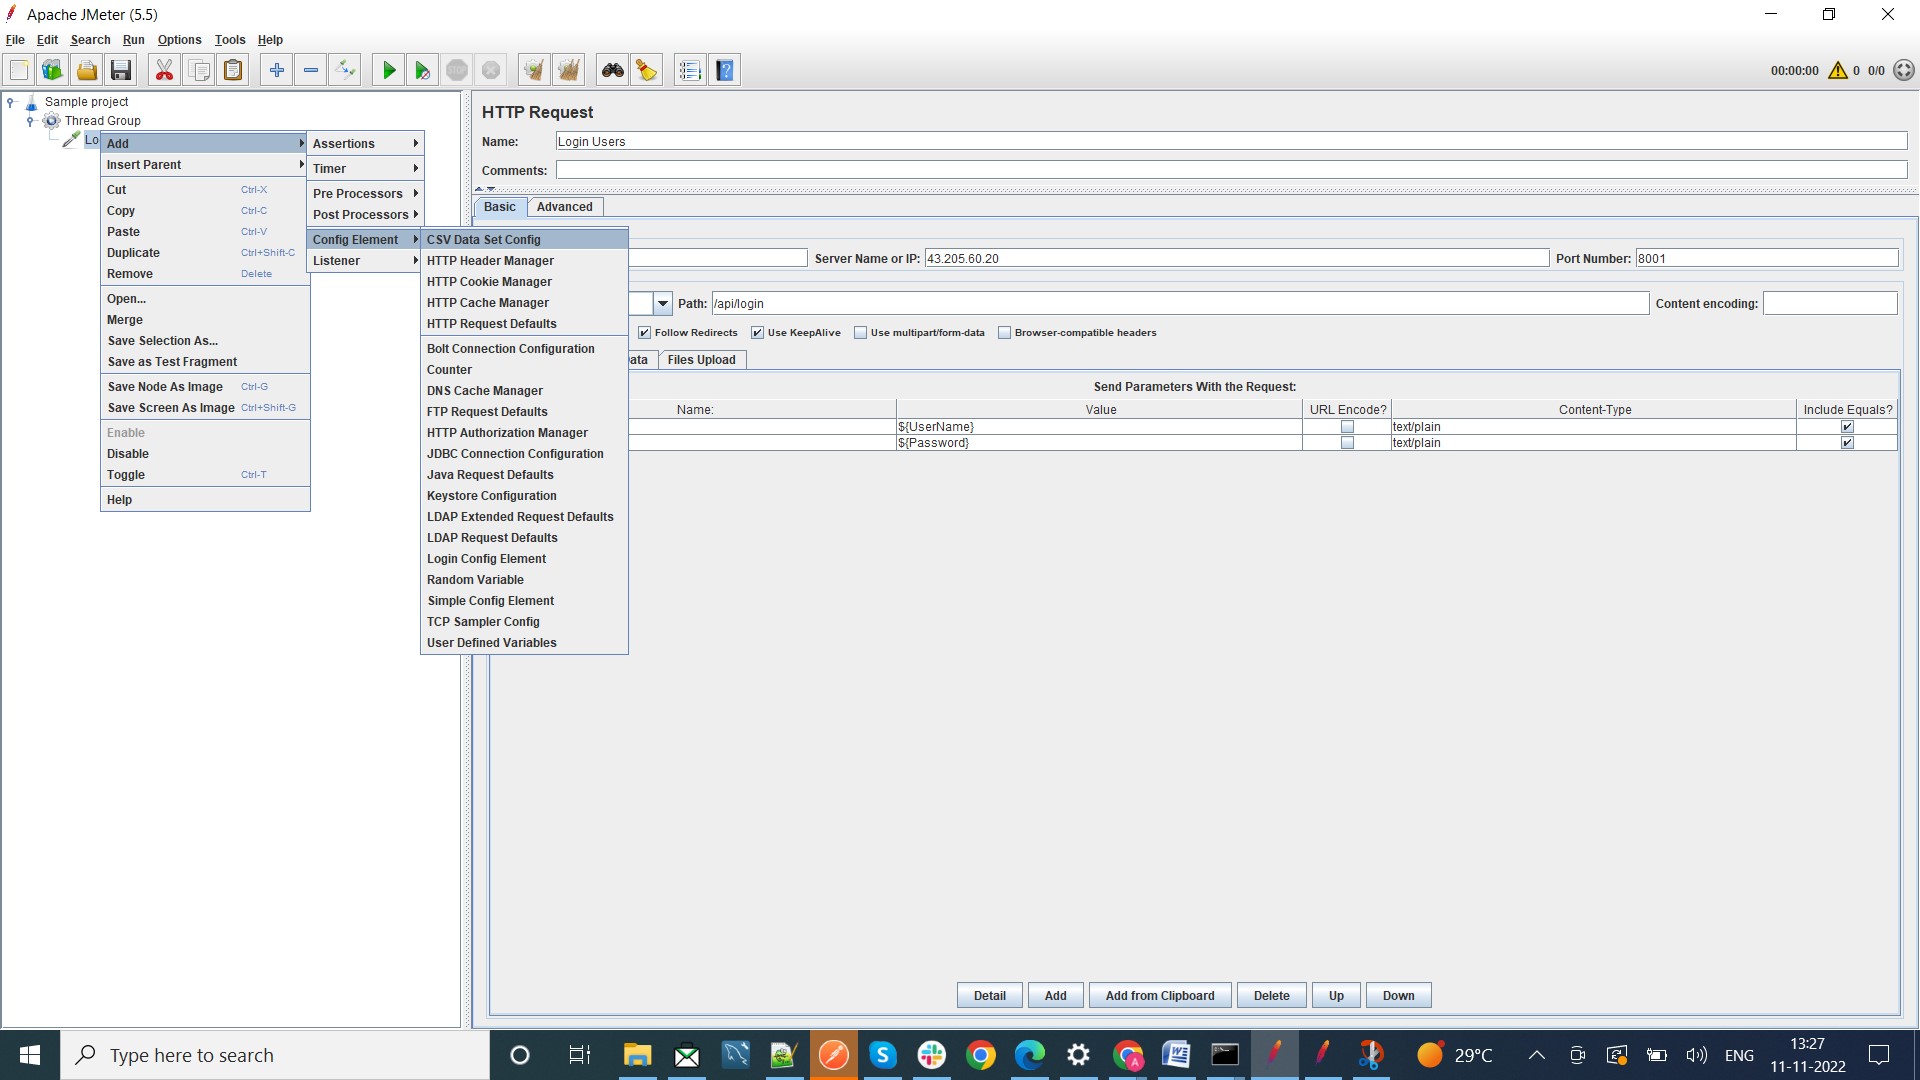
- We need to create one CSV file and right-click on “Login users” and add one CSV data set config which is shown in the screenshot.
- After adding the CSV file fill in the required data.
Add listeners in the test plan so we can see the actual result.
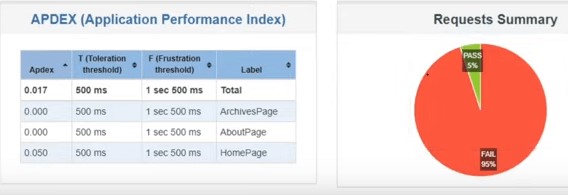
Now we can run the test and generate the report which is shown below.
Example of JMeter Report.
Conclusion
By now, you would have learned what JMeter is, and how you can install JMeter on your system. You would have understood the entire process to download and install JMeter with the help of a hands-on demo. Furthermore, you would now be able to run a test in JMeter and perform performance testing.
For more information on how to download and install JMeter, you can watch this video.
If you have any questions for us, let us know in the comments section of the “How to download and install JUnit” tutorial. Our experts will answer them for you, at the earliest.
STAY IN THE LOOP
Subscribe to our free newsletter.

What is the Bet Stop and How does Bet Stop – the National Self-Exclusion Register™ work? Bet Stop – the National Self-Exclusion Register™ is a safe and free Australian Government initiative to block yourself from all licensed Australian online and phone gambling providers in a single process. You can register at any time and you […]

Websites are always prone to security risks. This may impact businesses. Strengthen your web portal’s security. Read through our article for some problems and actionable solutions to ensure your web portal is secured OpenSSL 1.1 is considered outdated and vulnerable Issue a new SSL certificate (CA) and update it in your apache SSL configuration file. […]